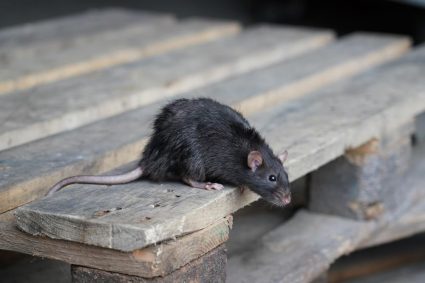
Cleaning mouse droppings can be a daunting task, and if not done properly, can pose health risks. This comprehensive guide will walk you through the process of safely and effectively cleaning mouse droppings, protecting your health, and preventing future infestations.
To clean mouse droppings safely, first ventilate the area and don protective gear. Do not sweep or vacuum the droppings. Instead, use a bleach solution or EPA-registered disinfectant to soak the droppings, then wipe them up with paper towels and dispose of them in a sealed garbage bag. Finally, disinfect the entire area and wash your hands thoroughly. For severe infestations, consider hiring a professional pest control service.
The Health Risks of Mouse Droppings
Before we delve into the cleaning process, it’s crucial to understand the potential health risks associated with mouse droppings. Mice are known carriers of several diseases such as Hantavirus Pulmonary Syndrome (HPS), Salmonellosis, Lymphocytic Choriomeningitis (LCM), and Leptospirosis. These diseases can be transmitted to humans through direct contact with mouse droppings or by inhaling aerosolized particles from the droppings.
Precautions Before Cleaning Mouse Droppings
Safety should always be your top priority when dealing with mouse droppings. Here are some precautions you should take:
- Ventilate the area: Before you begin cleaning, open all windows and doors to allow fresh air to circulate in the area for at least 30 minutes.
- Wear protective gear: Use rubber or plastic gloves, an N95 mask or respirator, and wear long sleeves and pants to protect yourself from potential exposure to diseases.
- Do not sweep or vacuum: This can cause contaminated particles to become airborne.
Necessary Cleaning Supplies
To effectively clean mouse droppings, you will need the following supplies:
- Rubber or plastic gloves
- N95 mask or respirator
- Bleach solution (1 part bleach to 9 parts water) or an EPA-registered disinfectant
- Paper towels
- Garbage bags
- Mop or sponge
Step-by-Step Cleaning Process
- Prepare the disinfectant solution: Mix one part bleach to nine parts water or use a household disinfectant.
- Soak the droppings: Spray the mouse droppings and surrounding area with the bleach solution or disinfectant, and let it soak for at least 5 minutes.
- Wipe up the droppings: Use paper towels to pick up the soaked droppings and cleaning product, and dispose of them in a garbage bag.
- Disinfect the area: Mop or sponge the area with the disinfectant, including all hard surfaces like floors, countertops, cabinets, and drawers.
- Wash your hands: After removing gloves, wash your hands with soap and warm water or use a waterless alcohol-based hand rub if soap is not available and hands are not visibly soiled.
- Dispose of the waste: Dispose of the sealed plastic bag into another plastic bag, seal it, and dispose of it in a covered garbage container with a tight-fitting lid.
Preventing Future Infestations
Prevention is the best way to avoid the hassle of cleaning mouse droppings. Here are some steps you can take to prevent future mouse infestations:
- Seal cracks and holes in your home.
- Install door sweeps on exterior doors and repair damaged screens.
- Store food in metal or glass containers with tight lids.
- Keep trash in rodent-proof containers with tight-fitting lids.
- Remove potential rodent nesting sites from your property.
When to Hire a Professional
If the infestation is severe, it is best to contact a professional pest control service for assistance. These professionals are trained to handle rodent infestations safely and effectively, reducing the risk of disease transmission.
In conclusion, cleaning mouse droppings doesn’t have to be a daunting task. By following these steps, you can safely and effectively clean mouse droppings, protect your health, and prevent future infestations. Stay safe and remember, when in doubt, don’t hesitate to call a professional.

